
Turn Visitors into Leads: How to Install the Acumen Web Tag in 5 Easy Steps
Acumen Lead Identification is a powerful tool designed to help you identify and connect with high-intent leads visiting your website.
Acumen matches your website visitors to their LinkedIn profiles, revealing detailed work history, job titles, and skills. By providing accurate cross-device recognition and comprehensive professional information, Acumen enables you to capitalize on untapped opportunities and accelerate your pipeline growth.
This guide outlines the step-by-step process for implementing the Acumen web tag, enabling you to harness the power of the new browsing analytics feature.
Now you can unlock valuable browsing information from your site visitors to make the most of your traffic.
Step 1: Navigate to Platform
If you don’t already have a FullContact platform account, you will need to create one. Contact our solutions team to set Acumen up for you.
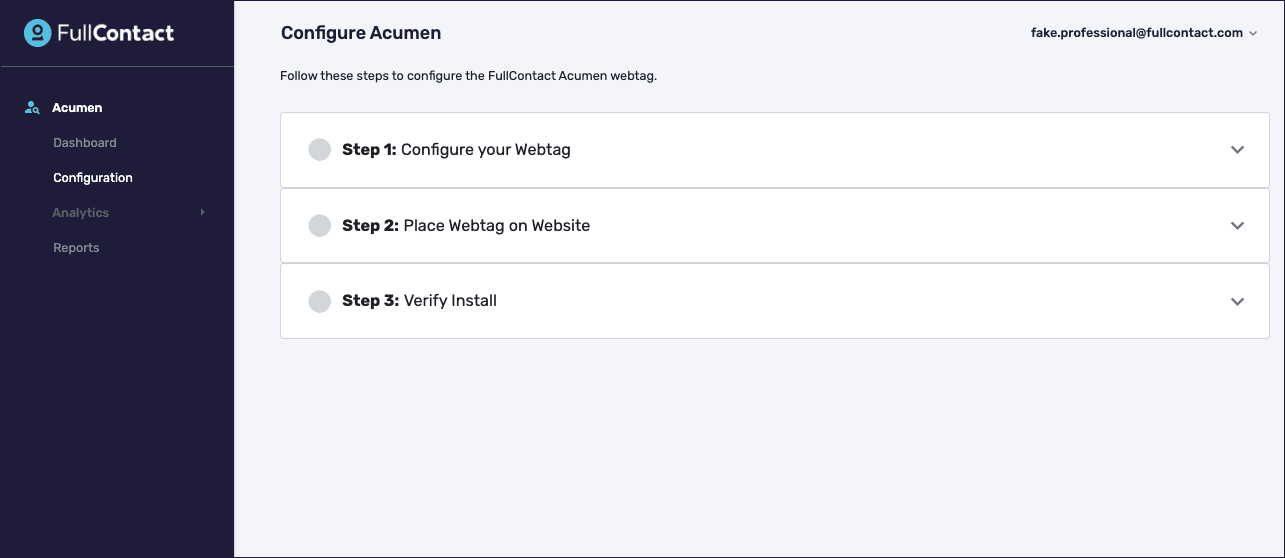
After creating your account and accessing Acumen, the configuration wizard will guide you through three essential steps:
- Customize and grab your webtag code
- Install the webtag on your website
- Confirm FullContact detects the installed tag on your website
Step 2: Whitelist Your Domains
Once you expand Configure Your Webtag, the first option is to whitelist your domains.
- Expand “Configure Your Webtag”
- Add each domain you want to track individually
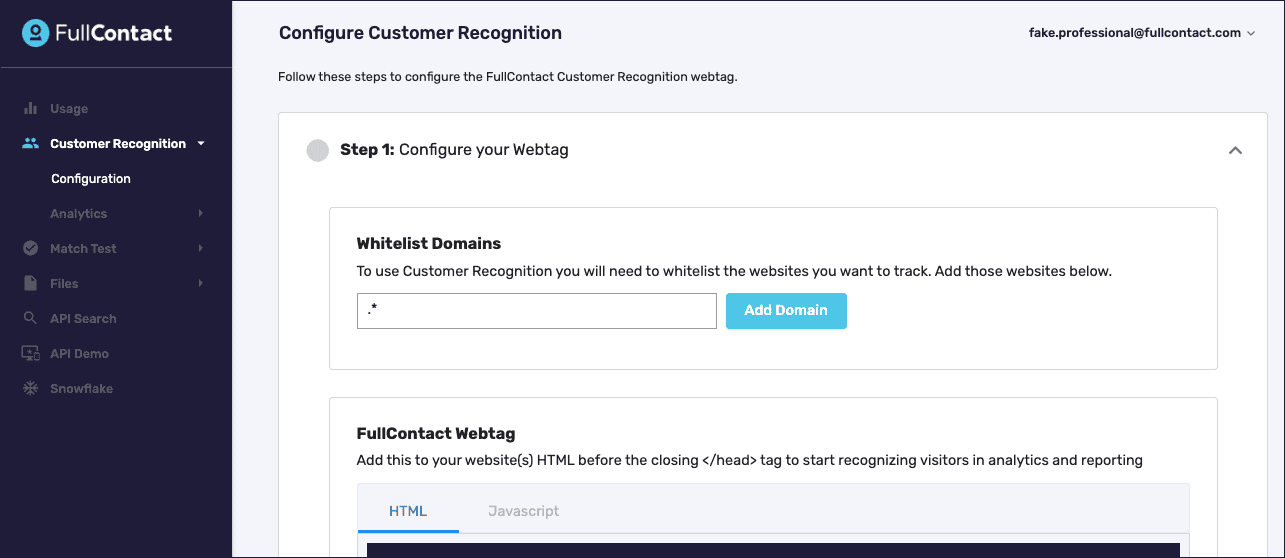
- For multiple domains, use the regular expression “.*” to whitelist all
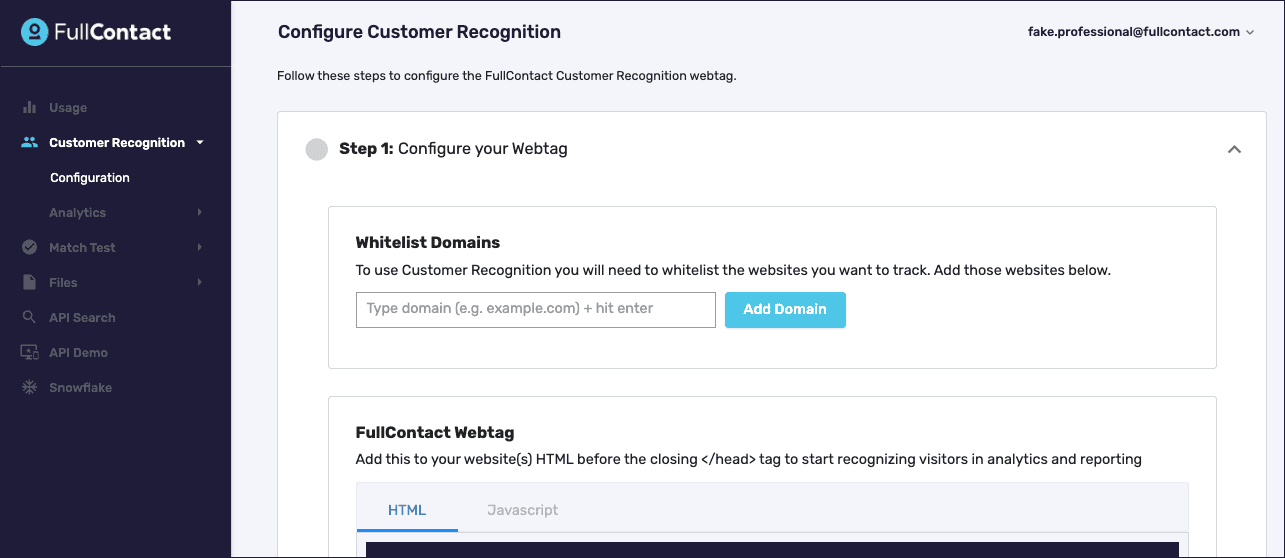
You must whitelist all websites you intend to track with the Acumen webtag.
Ex: homestore.com is the website where the tag will be embedded, so we type that in the input field and hit Add Domain.
You can either key in each domain individually if you are tracking just a handful of websites, or if you are tracking a large amount of websites you can add a simple regular expression to whitelist all domains using your webtag and its embedded key.
To whitelist multiple domains, use a period followed by an asterisk: .*
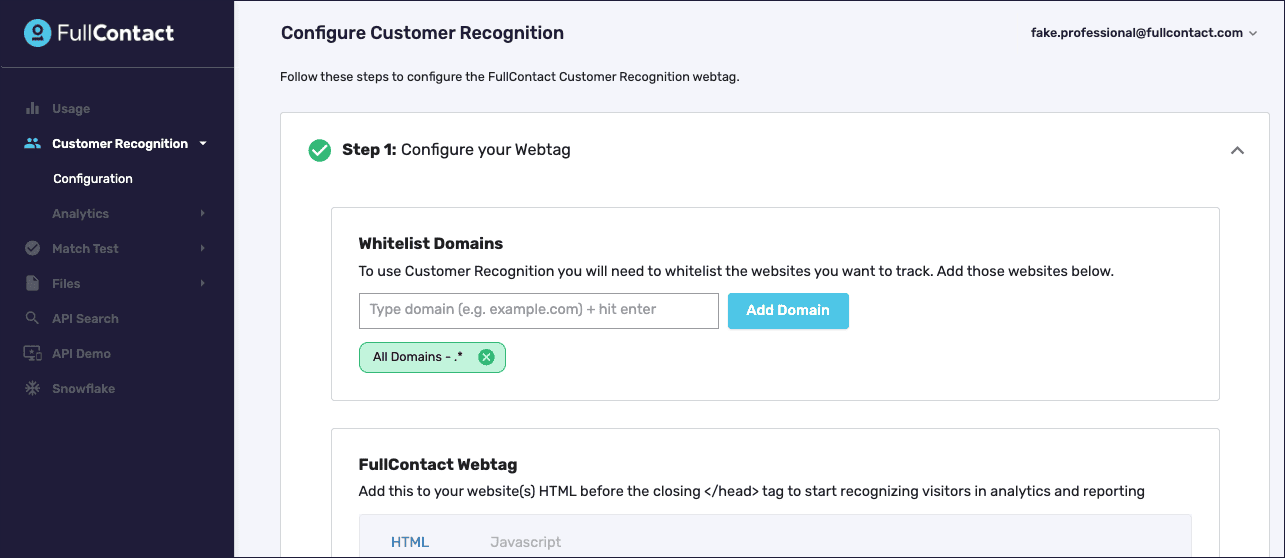
The UI will recognize this regular expression, and indicate that all domains are whitelisted.
Step 3: Configure Advanced Settings (Optional)
Let’s walk through the advanced configuration settings. These settings are optional, but do contain some powerful features that you should consider enabling for your installation like tracking page views.
Manage Consent
This option allows you to display a banner to manage consent on your website. Useful if you have not implemented some other measures to capture tracking consent on your website including but not limited to the implementation of a Consent Management Platform (CMP).
View this documentation for an in-depth overview of this feature and how it works.

Track Visitor Behaviors
Track Visitor Behaviors records a visitor’s page visits, the sequence of pages visited on your website, and the time spent on your pages. It then ties these records back to a specific lead’s profile. The sequence of pages a lead has visited shows up in the Acumen lead report when a user clicks on a lead.
If you would like to view these analytics, turn this toggle on and click save.
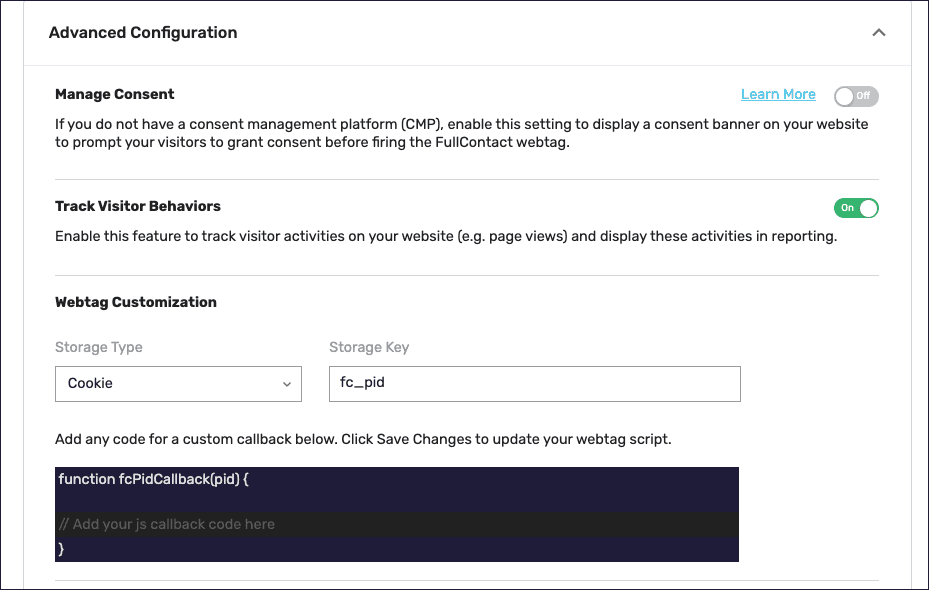
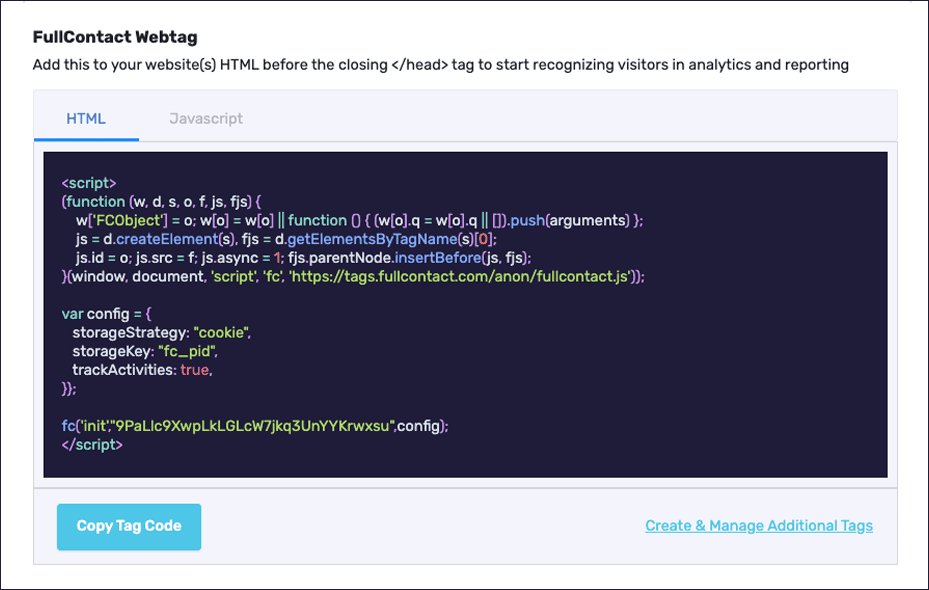
Once enabled a new setting called trackActivities will be added to the config section.
trackActivities: true
Here is a screenshot showing that setting within your webtag code:
Webtag Customization
You also have the option to choose how to store the FullContact PersonID (cookie or local storage) and add a callback function.
If you would like to add a callback function to handle the PersonID, you can type it in the code block directly to integrate it into your tag installation.
Step 4: Install Acumen Webtag
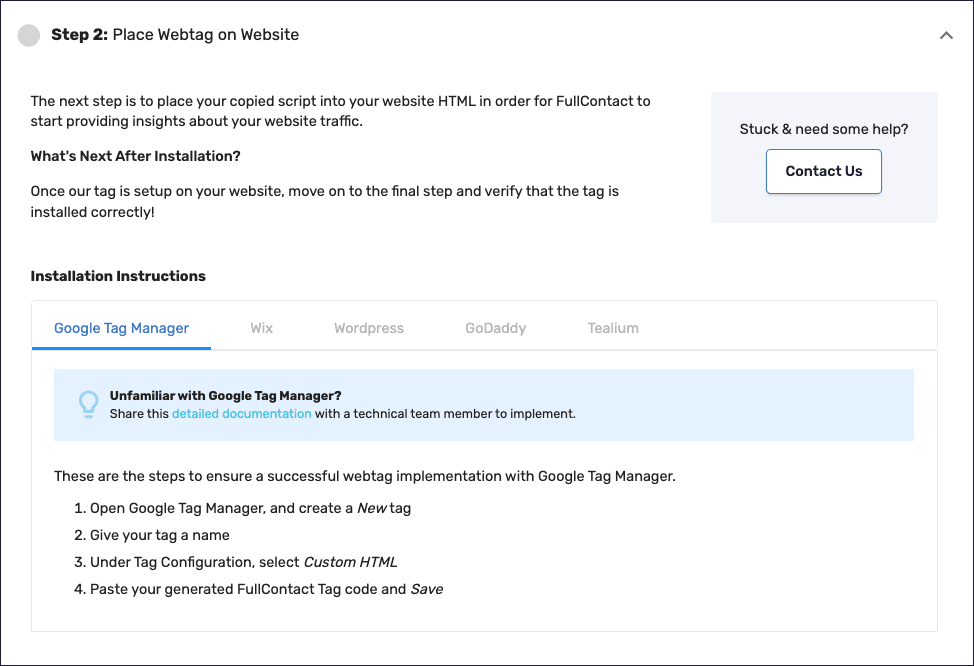
Now that your webtag is customized for your usage, you need to install it using a tag manager or directly on your website.
Click Copy Tag Code to grab the code. We’ve provided an HTML and Javascript version of the webtag for ease of use.
If you are less familiar with how to install the webtag on your website, we’ve provided instructions on how to install the webtag on a number of popular web-based platforms. These instructions are summarized, with links to expanded documentation within the configuration wizard.
Step 5: Verify your Webtag Installation
Once your webtag is installed and starts to send events, the platform can automatically complete this step on its own. This approach will vary based on the circumstances on your website, most times this verification may autocomplete within the first hour.
If you’ve just installed the webtag and want to manually verify the installation immediately, for either your top-level domain or subdomain, you can choose your whitelisted website from under the Domain dropdown.
Once you’ve successfully verified your installation, you’ll see a success message indicating we’ve started to receive data from this website.
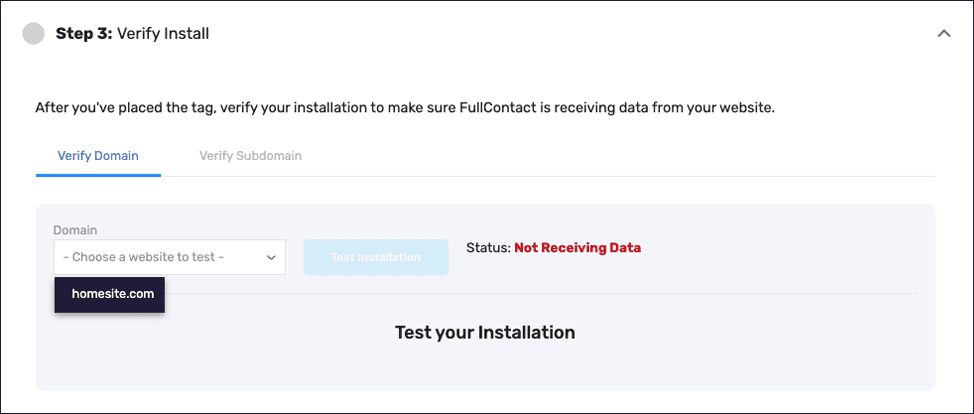
If the webtag is installed correctly, both step 2 + step 3 will appear as complete (green checkmark).
If this manual check indicates your webtag might not be installed correctly, here are a couple of things to consider:
- The check will fail if there are active ad blockers
- The check will fail if there is a consent banner already in place on the website
You’re Done!
Now that the webtag is installed, you should start to see data flowing into the Acumen product. Navigate to the Reports section in Acumen to see your leads.
If you’ve enabled the “Track Visitor Behaviors” setting for your webtag, you can click on individual leads to view their browsing data:
- Visited webpages
- Order of page visits
- Webpage titles
- Webpage URLs
- Time spent on each page
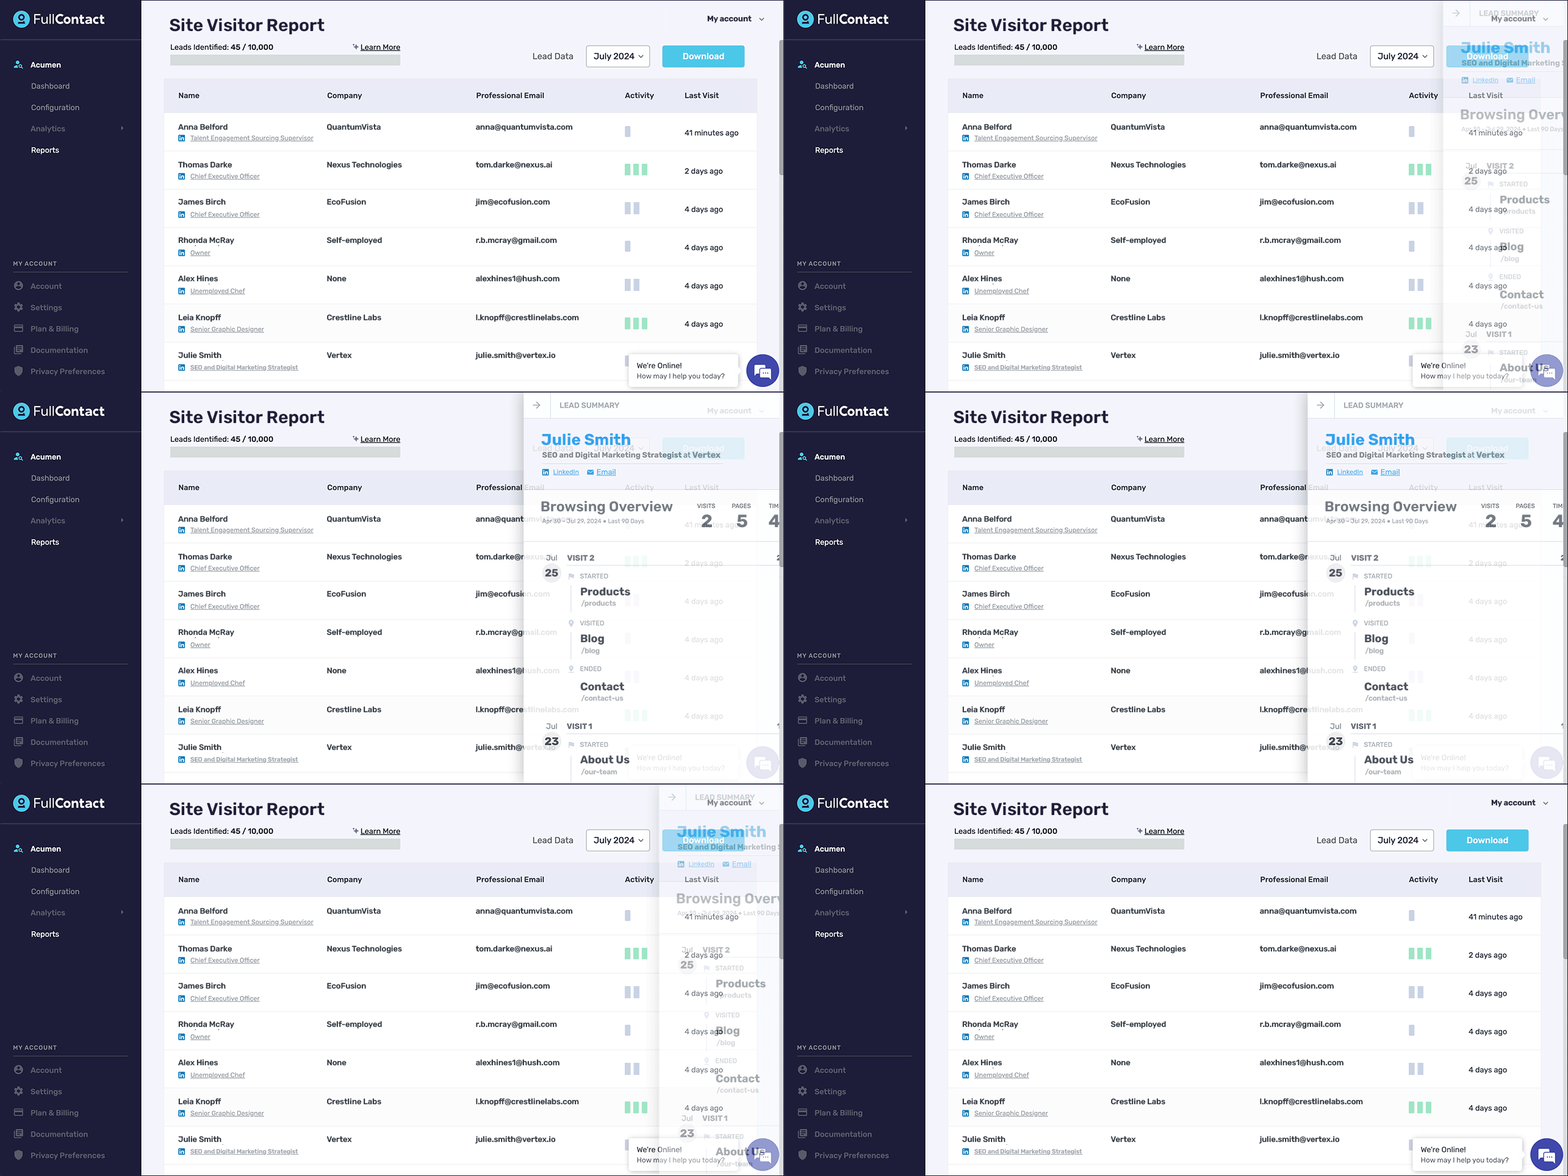
Leads will start to display in the Reports section (Acumen > Reports).
Amplify Your Lead Generation with Acumen
By following these steps to set up the Acumen web tag, you’ve unlocked a wealth of insights into your website visitors’ behavior. This information will enable you to identify your most engaged and promising leads, tailor your outreach based on their browsing patterns, and initiate meaningful conversations.
Acumen can match visitors to LinkedIn profiles and provide detailed browsing analytics, equipping you to target your most valuable prospects with precision and driving qualified pipeline growth.
Keep in mind, that the average customer identifies 100 leads with professional email addresses within the first week of their 14-day trial, so you’re on the path to tapping into a goldmine of qualified customers.
Recent Blogs
-
 August 28, 2024 The Sales Rep's Guide to Maximizing Productivity with Website Visitor Data Acumen, Media Personalization, Marketing & Sales
 -
 September 21, 2023 Discover How FullContact is Building Trusted Customer Relationships through Snowflake's Native Application Framework Customer 360, Website Recognition, Identity Resolution
 -
 September 20, 2023 Transform Your Customer Experience with FullContact Customer Recognition and Boost Your Conversions Website Recognition, Identity Resolution